Self-Service Payment Request System
Purpose
The new features in the Financial Management module in Self-Service enable us to streamline our current Financial Obligation Form process to an electronic format. We will be able to request payment vouchers, upload the required documentation needed for approvals and approve the voucher request.
Authorization Limit for Approval
- Authorized up to & including $2,500 – Budget officer/Dean
- Authorized up to & including $10,000 – Vice-President
- Required on all invoices over $10,000 – VP of Finance
- Required on all invoices over $200,000 - President
Creating a Payment Request
Before making a request for payment, make sure you have all necessary documents and information.
Log in to Self-Service and click on Financial Management.

Then, click on Procurement.

Click on Create to initiate your payment voucher. Fill out the required information designated by an *.
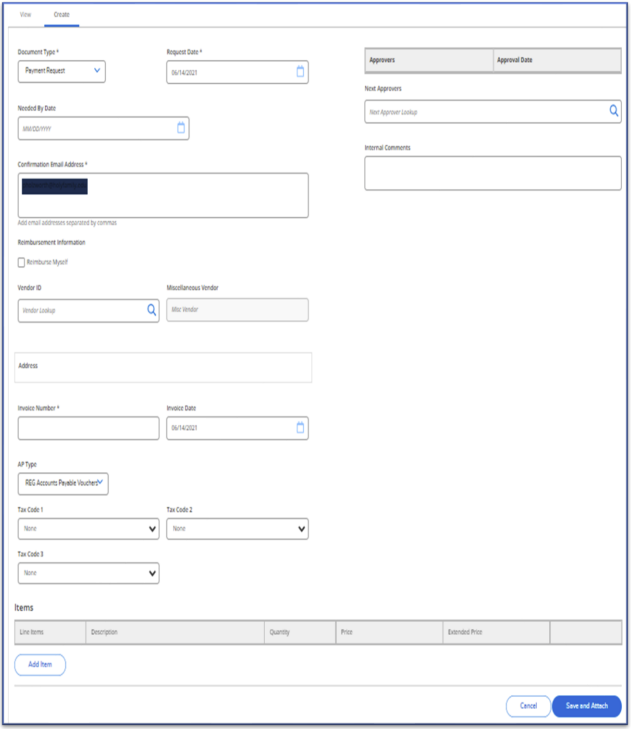
Document Type: Remains Payment Request
Request Date: Enter the date of your request
Confirmation Email Address: Enter your Holy Family email as the confirmation email is for internal use only.
Invoice Number: Most of the supporting documentation you will attach will have an invoice number and that is the number you’ll put in this area, if one is not provided – please use the reimbursement for methods below.
- Reimbursement for a person – In the invoice number area you will put the last name and date of request
- Reimbursement for a company – In the invoice number are you will put the request date.
Needed by Date: Enter the date the check should be processed. Accounts Payable office will issue checks 2 weeks in advance of this date.
Approvers: Enter the name of the approver(s). You can enter a partial name then click on magnifying glass for full information. To remove an approver – click the red button next to their name.
Internal Comments: Add comments for the approver regarding the invoice or attached documents. Example: Process as a paper check, automatic bank withdrawal, PO#.
Reimburse Myself: If payment is for reimbursement, click on Reimburse Myself. Your name will appear. Under Vendor ID your address will appear. Please update address if needed.
Vendor ID: enter the name of the Vendor then click on magnifying glass. This may give you several names to choose from – click on the vendor that you are paying. If a vendor is not listed, please contact the Accounts Payables office. If the vendor is new, please submit through paper process below.
New Vendors (paper process)
- The requestor will send a W9 to payables@holyfamily.edu for any new vendors to be added. The updated W9 form is available on the Accounts Payable web page of Holy Family University.
- The Accounts Payable Processor will provide the requestor the Vendor ID. Once the Vendor ID is received, you can submit your payment requests electronically and paper requests are no longer needed.
ACH E-Check Payment Info (paper process)
- The requestor will send an electronic payment form to any new vendors. Electronic payment form is available under Vendor Information on the Accounts Payable web page of Holy Family University.
- The Accounts Payable Processor will let the requestor know when the electronic payment is completed. Once completed, you can then submit your payment requests electronically and paper requests are no longer needed.
AP Type: Remains REG Accounts Payable Vouchers
Tax Code: No need to fill in.
Items: Click Add Item to enter the information necessary for payment processing. This includes description, quantity, price, GL Account #, project (if applicable) and total amount. To remove an item – click the red button next to that item. In the description box you should enter the Account#, Customer#, Project #, etc. If none of these are listed on the invoice you should then enter a SHORT description. Note: if you do not know the entire GL number you can enter your 4-digit department number and a list will appear for you to pick the GL number payment is to be made from.
When complete, click Add Item. If you have another item for the same invoice, click Add Item and then repeat the above process. When you have entered all your information – click Save and Attach.
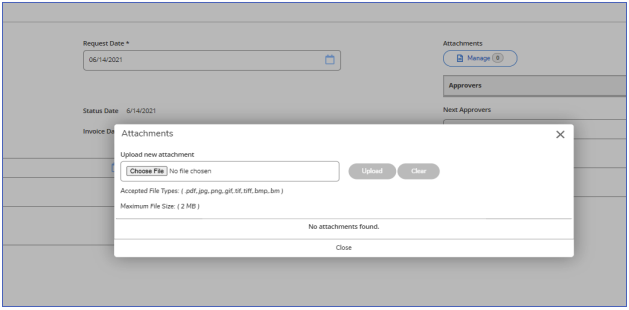
Save and Attach: your supporting documents can now be attached for your payment request. The accepted file types are (.pdf, .jpg, .png, .gif, .tif, .bmp, .bm).
Vouchers without supporting documents attached will not be approved.
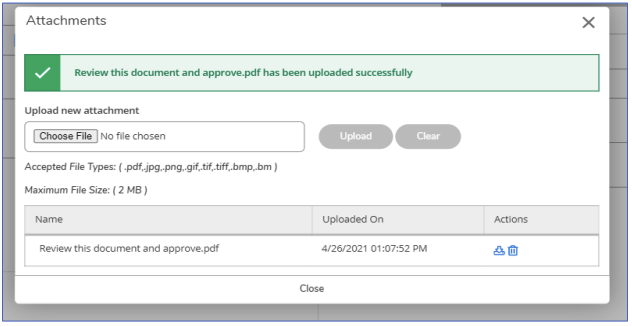
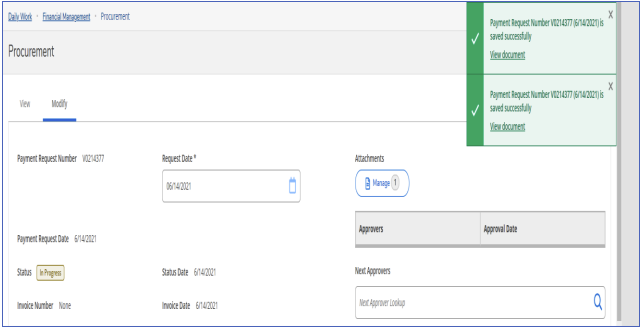
Once you have uploaded your documentation, you will see a message stating that it was successful.
Under Attachments you will see Manage states one (1). There are now attachments. You can also
delete the attachment if it is incorrect.
When finished entering and attaching all your items, a message will appear that your voucher was
created. Note: under Attachments you will see Manage states one (1). There are now attachments.
Attachments can be deleted if they are incorrect.
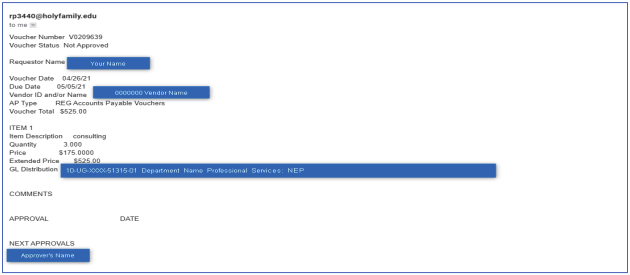
You will also receive a voucher confirmation and approval email.
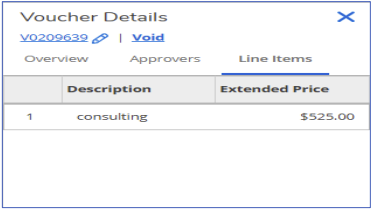
Voucher Details
To attach the required documents for your approver and to see the progress of your voucher.
Overview: You can view the details of your payment request. This request is not approved and there are no attachments.
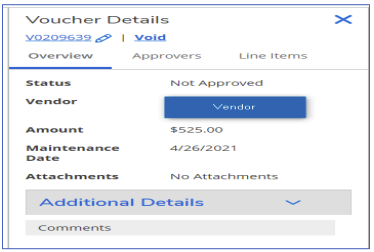
Additional Details: View more details about your voucher requests such as invoice number, check number and date vouchers was paid.

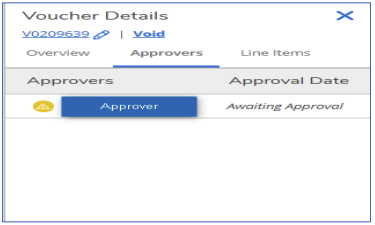
Approvers: To check the approval status of your voucher.
Line Items: To review the line items entered for your voucher.
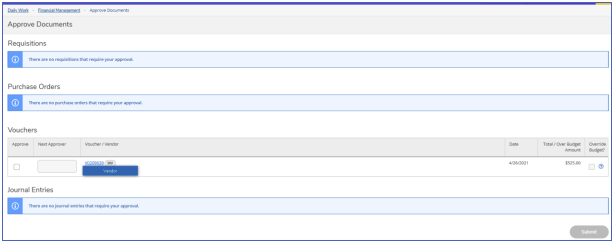
For Approvers Only
For approvers who need to approve voucher requests. Log into Self Service and click on Approve Documents.

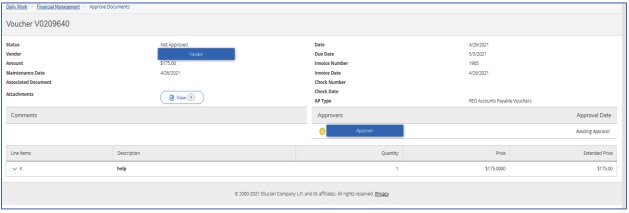
You will see the Vouchers that need approval. Click on the voucher number hyperlink to see the information and required documentation about the voucher.
Review all information about the voucher request. Click view to see any attachments pertaining to the request.
Once you have completed reviewing the voucher request, click to approve and then submit.
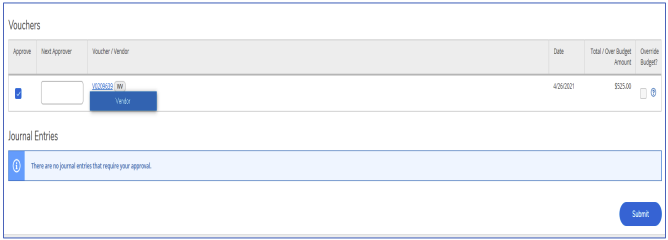
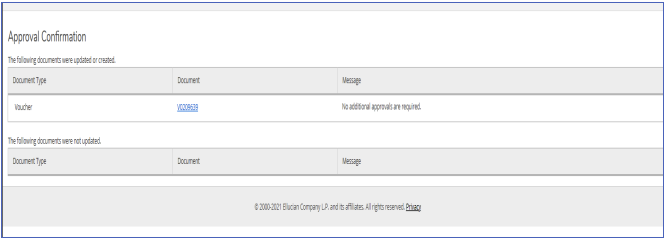
An approval confirmation will show stating that you have approved the voucher request. If there is a next approver, they will then have to approve the request before payment can be made. Once all approvers have approved the voucher request, then payment to the vendor can be made.